Importing & Exporting Data
Currently importing and exporting is possible via code or our import tool. We will make a UI eventually. In the meantime, we have written a script that uses the Godot Inspector as a makeshift UI. You can use it to make a data file for your other scenes.
Importing Data
Open
addons/terrain_3d/tools/importer.tscn.Click Importer in the scene tree.
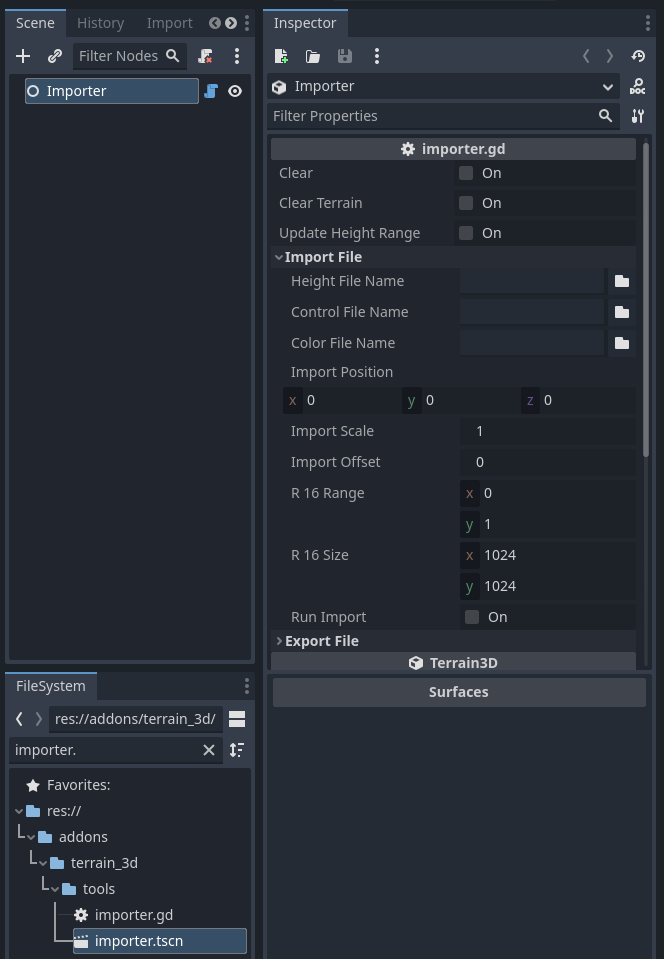
In the inspector, select a file for height, control, and color maps. See formats below. File type is determined by extension.
Specify the location of where in the world you want to import. Y is ignored. X/Z are rounded to the nearest
region_size(defaults to 1024). The placed map is centered on that point. So a location of (-2000, 100, 1000) will be imported centered around (-2048, 0, 1024).Notes:
You can import multiple times into the greater 16k^2 world map by specifying different locations. So you could import multiple maps as separate islands or combined regions.
It will slice and pad odd sized images into region sized chunks (default is 1024x1024). e.g. You could import a 4k x 2k, several 1k x 1ks, and a 5123 x 3769 and position them so they are adjacent.
You can also reimport to the same location to overwrite anything there.
Each time you import, it will overwrite the height, control and color for the section you imported. Even if you specify only the heightmap and leave control/color blank, it will erase any control/color data in that region. (will be separated later)
Specify any desired height offset or scale. The scale gets applied first. (eg. 100, -100 would scale the terrain by 100, then lower the whole terrain by 100).
Note that we store full range values. If you sculpt a hill to a height of 50, that’s what goes into the data file. Your heightmap values (esp w/ EXR) may be normalized to the range of 0-1. If you import and the terrain is still flat, try scaling the height up by 300-500.
If you have a RAW or R16 file (same thing), it should have an extension of
r16orraw. You can specify the height range and dimensions next. These are not stored in the file so you must know them. I prefer to place them in the filename.Click
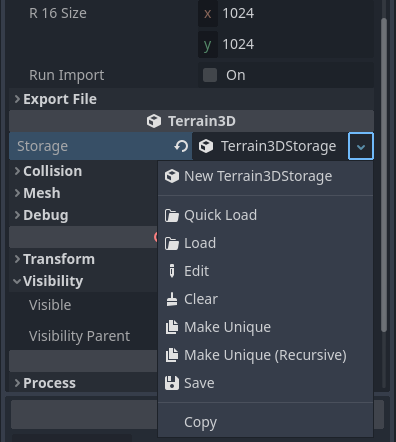
Run Importand wait 10-30 seconds. Look at the console for activity or errors. If theTerrain3D.debug_levelis set todebug, you’ll also see progress.When you are happy with the import, scroll down in the inspector (half of it is hidden by the
Texturespanel) until you seeTerrain3D, Storage.Click the right arrow next to the Terrain3DStorage file and save the file wherever you wish. Make sure to save it as
.reswhich is a binary Godot resource file.
You can now load this res file into a Terrain3D in any of your scenes. You can also preload an existing storage file in the importer, then import more data into it and save it again.
Supported Import Formats
We can import any supported image format Godot can read. These include:
Image formats for external files:
bmp,dds,exr,hdr,jpg,jpeg,png,tga,svg,webpR16 Height map aka RAW. See below.
Height map
Only
exrorr16/raware recommended for heightmaps. Godot PNG only supports 8-bit per channel, so don’t use it for heightmaps. It is fine for external editing of control and color maps which are RGBA. See Terrain3DStorage for details on internal storage.R16: For 16-bit heightmaps read/writable by World Machine, Unity, Krita, etc. The extension should be
r16orraw. Min/Max heights and image size are not stored in the file, so you must keep track of them elsewhere (such as in the name).Photoshop Rawis not R16. Use exr for photoshop.Zylann’s HTerrain stores height data in a
resfile which we can import directly. No need to export it, but his tool also exportsexrandr16.
Control map
Control maps use a proprietary format. We only import our own format. Use
exrto import an image you have previously exported from this tool.
Color map
Any regular color format is fine,
pngis recommended. The alpha channel is interpretted as a roughness modifier for wetness.
Exporting Data
Open
addons/terrain_3d/tools/importer.tscn.Click Importer in the scene tree.
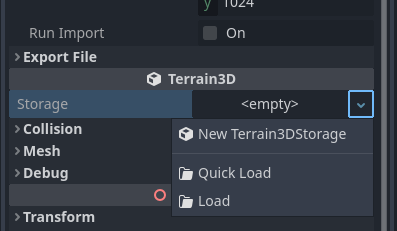
Scroll the inspector down to Terrain3D, Storage. Click the right arrow, and load the storage file you wish to export from.
Scroll the inspector to
Export File.
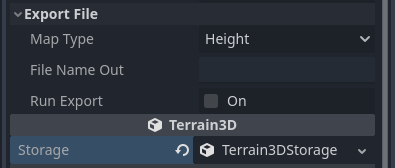
Select the type of map you wish to extract: Height (32-bit floats), Color (rgba), Control (RGB proprietary).
Specify the full path and file name to save. The file type is determined based upon the extension. You can enter any location on your hard drive, or preface the file name with
res://to save it in your Godot project folder. See export formats for recommendations.Click
Run Exportand wait. 10-30s is normal. Look at your file system or the console for status.
Notes:
The exporter takes the smallest rectangle that will fit around all active regions in the 16k^2 world and export that as an image. So, if you have a 1k x 1k island in the NW corner, and a 2k x 3k island in the center, with a 1k strait between them, the resulting export image will be something like 4k x 5k. You’ll need to specify the location (rounded to
region_size) when reimporting to have a perfect round trip.The exporter tool does not offer region by region export, but there is an API where you can retrieve any given region, then you can use
Imageto save it externally yourself.
Supported Export Formats
We can export any supported image format Godot can write. These include:
Image save functions for external files:
exr,png,jpg,webpImages stored in a Godot resource file:
tresfor text,resfor binary (withResourceSaver::FLAG_COMPRESSenabled)R16 Height map aka RAW. See below.
Height map
Use
exrorr16/rawfor external tools, orresfor Godot only use. Godot PNG only supports 8-bit per channel, so it will give you blocky heightmaps.R16: For 16-bit heightmaps read/writable by World Machine, Unity, Krita, etc. Save with the extension
r16orraw. Min/Max heights and image size are not stored in the file, so you must keep track of them elsewhere. See below to acquire the dimensions.Photoshop Rawis a different format. Use exr for photoshop.
Control map
Control maps use a proprietary format. We only import our own. Use
exr. It won’t give you a valid image editable in other tools. This is only for transferring the image to another Terrain3D Storage file. See Controlmap Format.
Color map
Use
pngorwebp, as they are lossless rgba formats that external tools can edit. Useresfor Godot only use. The alpha channel is interpretted as a roughness modifier for wetness.
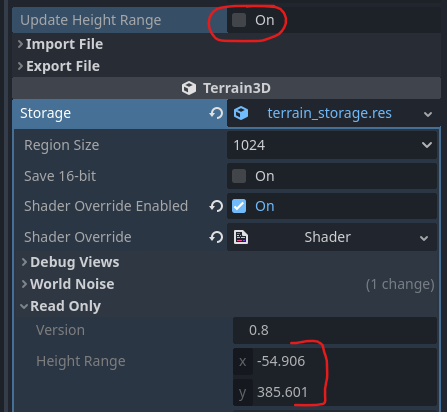
Exported Image Dimensions
Upon export, the console reports the image size.
You can get the height of the data by clicking Update Height Range, then looking in the read only data of the storage file.